SLIDE1

Fiber Fun

All things Fiber and fluffy

Spinning

Ply it good!

All things Embroidery

Cross stitch and other stiches.

Knit, purl, sc2tog

All things created with yarn and some hooks

Weaving

Shuttles, waprs and more

Wednesday, October 5, 2016

How fine are you?

Spindle spinning.
Blue comparison thread is a standard sewing machine thread.
After I got the basics of spinning sorted my natural tendencies said: "You want to spin thin". So spinning thin has never been difficult, especially once I got my lovely lace flyer for my Majacraft wheels. Recently I noted there was a competition in Tasmania Australia where you try and spin the longest amount of 2ply yarn from 10grams (0.353oz) of clean fiber. So to do this one must straddle that delicate line of thin, yet strong enough to stay together. One of the rules says you get disqualified if it breaks while judging. So even though I might not have enough time thanks to uni I decided to at least attempt an entry.


So how thin can I spin? 

Wheel spinning 
 So for the competition, you have to use straight fleece - no tops/batts etc. So I used some merino I had already flicked for other reasons. This fleece is still raw as I felt it would give a bit more grip (and I was too lazy to clean and eager to start). I do not know the micron count of the fleece though though. I do have some lovely 13micron that is clean I was tempted to use, but it seemed a waste for such a project. I didn't find I have any difficulties qith my lace flyer and spinning on the smallest whorl with very light tension. Though I found it was a fine line with tension and I ended up a couple of times winding it on the bobbin manually. I know I am going to lose some of the weight when I wash it so I am doing to do one bobbin of singles about 7grams then wash and assess. That way I can spin up about the same weight on another bobbin. You are allowed to enter more than 10g, they just correct the length for the weight. So while I wont go over the top I aim for more.

I also started spinning on my spindle. While this competitions top prize ($400 Ashford voucher) is for the wheel spun wool there are other categories for juniors, alpaca, e-spinner and spindle spinning. So I also started on my spindle. I will be away from home quite a bit this month and the entries have to be in by the end of the month. Sadly this month I will be going to two back to back medical conferences and I can't take my wheel with me. So spindle ahoy!

On a side note I was looking at some Facebook groups and noticed someone mention they were going to a conference this month in the same city asking for fiber store recommendations. I replied asking if they were going to thus particular one and lo and behold another spinner in such a small area of science I am in. So we are going to meet up and I am going to teach some spindle spinning. I was tempted to bring my spindle to the welcome drinks and when I get bored (as I will very quickly) I can alert her to my presence by sitting in the corner spindling. I hope I have the courage lol!

So I feel if I put it in by Thursday 27th with next day shipping it should be there by Friday. However, seeing I have recieved packages from Poland quicker than interstate shipping it will give an extra day just in case.
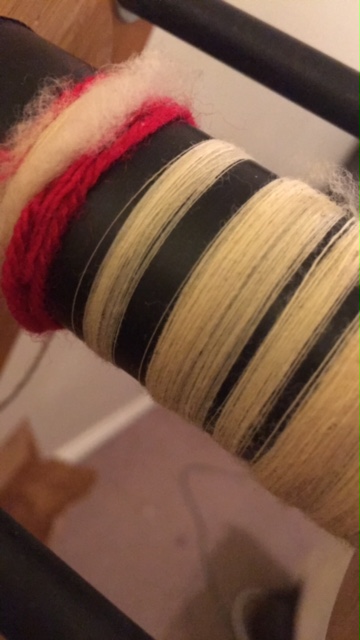
A total of 2 hours spinning and 1 gram of spun 
 One thing I am finding, which is obvious, is oh this is time consuming. This amount above was weight out to be one grams (only 10 or more to go lol). So long slog that might cut into this weeks Spinzilla spinning!

I will keep updated with how I go. If I don't make it I will post how much I end up achieving and compare to winners outcomes. The actual compeition wont be till next year, but the judes have a lot to examine, measure and weigh. So entries are super early. If things go well I might even attend this!

So as always I like attempting more than one thing so I would like to try wheel, spindle and alpaca. As this event is International and going on for awhile you can go through previous results and see people who have achieved personal bests and results from within Australia and positions world wide.

In the Wool the World standings (I think it is in meters)
Naoko T. Japan 1,442.982 Spindle 2005
Ernest J. Australia 1,210.922 Wheel 2003
Naoko T. Japan 1,131.457 Spindle 2003
Carol R. Australia 1,103.577 Wheel 2005
Sue M. UK 1,037.284 Wheel 2001

Alpaca World standings
Andrea R. Australia 182.088 Spindle 2015
Cheryl F. Australia 169.045 Wheel 2015
Joan D. Australia 140.734 Wheel 2015
Margaretha L. Denmark 117.586 Wheel 2015
Linda S. UK 102.033 Wheel 2015

The 2015 Winners (it competition seems to be every 2nd year)

Wool
Amanda H. 677.064 UK
Ann F. 300.370 UK
Andrea R. 279.356 Australia

Alpaca
Cheryl Fletcher 169.045 Australia Joan Dicker 140.734 Australia Margaretha Liebmann 117.586 Denmark

Spindle Wool
Wendy C. 126.193 USA
Cheryl F.111.375 Australia
Mary S.67.242 Ireland

Spindle Alpaca
Andrea R. 182.088 Australia

E-Spinner
Sandra D. 196.794 UK
Dean R. 117.533 Australia
Beth H. 110.544 USA

There are even more breakdowsn in the results to investigate.

So how fine and long can you spin?
Keep an eye on my Instagram page for my frequent updates.


Sunday, September 4, 2016

Instagram

You can also follow me on Instagram for more semi-regular fiber pictures. 


Kitty approves of spinning

Friday, September 2, 2016

Review: Frank Williams Turkish Spindles

Many moons ago I acquired some spindles. Now that I have had extensive time to play I feel I can give a much more thorough review. My previous experience with spindles has been chunky no name drop spindles. These are my first grown-up spinner spindles! So as of yet, I can't compare between spindle makers. So please enjoy my review of Frank Williams Spindles

I had seen these spindles at class with a fellow spinner  gushing about her recent buy. As I had been in the market for a Turkish spindle I was very happy to see Frank was selling at the Winter Wool Festival coming up soon .

When I rushed to his table I was greeted with a table of delightful tools (picture conspicuously absent). There was a mixture of Turkish spindles, drop spindles and various support spindles. Even a cursory glance informed me that this was going to be a difficult decision. 

Frank himself was manning the store and his affable nature allowed for a delightful discussion on his spindles.  As well as spindles he also created an assortment of tapestry bobbins (and hopefully some distaffs in the near future after our chat).  He sells off Etsy where he also has a loyalty club where  your 11th is free (including shipping). There is an associated Ravelry group for people to chat and share their goodies. You will also see him at assorted fiber festivals, especially the smaller sydney ones and bigger regional. 

As I only have his Turkish spindles (so far) I will reserve my review to them only.
Most important is the price. One can have beautiful spindles, but if they cost an arm and a leg..... I have also found the dissatisfaction of cheap and lousy. Frank's spindles cost $55 each, which I think is a very decent price range. One which allows for far too much impulse purchasing! The Turkish spindles are the slotted arm type and available in 5 different sizes.
From Frank Williams Etsy store photo
I purchased the Olive Ridley and Hawksbill (Mini and Small), these sizes are made for lace weight spinning. The shafts have slightly pointed tips and notches on each end to fix your leader yarn. The benefits of Turkish spindles over other common types of spindles is the ability to make a centre-pull ball while wrapping your freshly spun yarn. 

When I first got there I mainly checked out the visual appeal of different woods used (and have conveniently forgotten the wood types of my spindles).  I got to work spinning a few on my hand and did find the different wood seem to spin slightly differently at least to my feel. The small spindle I bought was not the one I was initially drawn to. I don't know how to describe it but the slight weight differences and densities of the wood did make a difference at least to me. I don't think it's enough to worry someone purchasing online. Though if you get the chance to see a bunch in person give them a little spin as well. 

The shafts are all made from West Australian Jarrah which is nice and light without feeling weak. 
While I forgot the wood types of my spindles I investigated online and think I know. 
Small wood: Cherry Wood by the look after checking out the Etsy store
With cotton


Mini wood: East Indian Rosewood or Western Australian Banksia, I can't decide as it doesn't have long grain, but more "speckly" and a dark colour. It also feels slightly softer compared to the Cherry Wood. 


Spinning wise, these are very well balanced with a nice spin time. Everything slots in well and the finish and wood choice make for a beautiful tool. It is very hard not to just buy some more now. The only thing I wish was that when purchased in person they came with some info. I noticed the business card he gave me has a space for info on the back to be filled out so he obviously does such things at least for the online sales. So if I were to buy one in person I would just ask him to fill it out in the future - easy fix. 

Saturday, August 20, 2016

Magnets! Or Rigid Heddle Upgrade


When I was considering buying my now pre-loved Kormski Harp Loom I had been investigating its options. Before I swapped out this out over my Ashford Rigid Heddle I had to be sure it was worth it. It was the same size as my rigid heddle (80cm), fits Ashford Heddles (sweet!), folds (oh thank god that size of loom is insane to carry, I would hate to try the 120cm!). The only negative seemed to be the ratchet and tension. Kromski has now addressed that and all their new looms are now Kromski Harp Forte! The main difference being the plastic ratchet pawl system had been upgraded to a metal one that included a rare earth magnet that acts as a lock system similar to the Ashford one. They also sell upgrades for older looms. So I spent the evening pimping out my Harp Loom to a Harp Forte with double heddles. 
I put in an order with the only Australian Kromski dealer KraftKolour. The upgrade was only $39 and the second heddles $35, which is comparable to Ashford price for a double heddle. The difference being Kromski just adds an additional set behind your current heddle blocks. Ashford, you have to remove your heddle block and put a new one on that holds both heddles. I will have to do a comparison on heddle blocks and how they are made as I am noticing some differences where there might actually be a winner and something to consider for someone looking between the looms. Shipping was a decent price and decent time frame. Nothing interesting to say of the dealer as everything happened smoothly and as expected. 

So I spent about an hour assembling both products, though the second heddle installation was 2 minutes!

Instructions that ended up in the bin!

So I had previously seen a YouTube video by Paradise Fibers and was very glad it was available and well done because the instructions were just black and white pictures....

This was very easy to follow along and I was very glad to have it up on my tv while I was assembling it. 

Assembly was pretty easy per se and only required a common Phillips head screwdriver. The demonstration uses an electric screwdriver just for speed of disassembling the loom.


Lots of screws! And my remote to stop and start the video.
 There is a bit of dissembling to do....actually a lot! So it is more time-consuming than difficult.

The video suggested removing the front and back cloth beam, but I didn't and had no issues. So one less item to worry about.

Installing the ratchet and pawl system is very easy, especially is you put together the loom originally (which I didn't). The hardest part and the one that caused the most swearing is the rare each magnet.

This magnet will stick to everything and you will spend 5mins trying to pry the two magnets apart from each other and then swear when you hear them click back....

This part requires a bit more skill, but if I can pull it off anyone can. You do need a bit of hand strength or a good drill at this stage as there is no pre-drilled hole for the magnet to be screwed in. So you need to position it and then screw it in. It is completely possible, but you need some strength. I have pretty sucky and weak joints so I would say it would be easier for others without joint problems.

New metal ratchet vs old plastic
While the change from plastic to the metal ratchet and pawl is obvious, metal is more hard wearing and can hold a much higher tension. What the rare earth magnet does is to keep the pawl close to the ratchet and not just relying on gravity. Ashford has a similar lock feature, but it only works to lock the ratchet in place once you are at the tension you want. When you unlock it is loose. I do really like this as I sometimes don't have the finger strength to unlock the Ashford ones and I can see them breaking over time.

Kromski new lock system


Ashford lock system


Putting the second set of heddle blocks on was super simple! Just line up with the pre-drilled holes, insert the one screw and tighten. DONE!

Old vs new

It will be interesting to compare how each company approaches the double heddle spacing and how the blocks are shaped. I have a feeling I may like this one over my knitters loom version. Though I still think the winner heddle blocks will be the Majacraft magnet ones I am keen to get and try.

The only thing to consider is with the rare earth magnet is if you have a pacemaker etc. I do have internal bling, so I just avoided dropping it near my internal metal. 


Friday, August 5, 2016

Learning to Weave - Part 2 - Making the Warp

So after kitty chewed on my warping board I grabbed my yarn and started the sometimes tedious but essential step of creating a warp to put on the loom.

Now there seem to be a few ways of warping a loom; front-to-back, back-to-front, directly off the warping board etc. I just followed what was in the Ashford Weaving book I got. It is important to figure which way you are going to warp your loom as it will impact the way you tie up your warp. The way suggested to me by the book has one cross over section.
A full warp like this = 2 ends
The cross I have heard multiple times is super, super important for keeping the threads in order. So for each colour I had to tie up 52 ends. This was 312 ends....My board couldn't cope with it so I divided the colours into two sections. 
I wasn't concerned about length as I only need about 25cm, but wanted more to practice so I just eyeballed a decent length beyond a meter and just did that. 

Rio colours?
You might notice the white thread on the bottom right? This is my counter thread. Every 10 thread I put a tie in there. As my warp colours were 52 ends it got a bit funny so my second warp I just threw those last 2 in the final pile so I had piles of 10,10,10,10, 12
Hard to tell the difference but there is a dark blue in there as well as purple. 
 Once every end is on then I put a million ties in several areas to make sure nothing went bad! I tied the entire warp at each point on the peg, I also tied the cross areas several times so that the cross was kept separate and easy to find. Then off the loom it comes and put in a simple hand-crochet single chain like thing. This allows it to be stored for later.
Add caption
What did I learn at this step? This is where your maths in Part 1 is crucial and planning your colour. As I am doing a simple colour gamp I chose to put the colours in the order they are mentioned on the rainbow.

Another thing I noted was that with 312 ends I will need to thread 312 heddles. In the standard Ashford 60cm 8 Shaft comes with 480 heddles to divide between 8 shafts. Now I didn't set up mine, but one would anticipate 60 heddles per shaft. I will be using 4 shafts to do a basic weave pattern (can be done on 8 but that is insane). So that leaves 240 heddles in my 4 shafts but I need 312...... and need 78 per shaft. So I picked up 3 packs of extra texsolv heddles (100 per pack). So I will add at least 50 more to each of the first 4 shafts and have pack spare.

To do basic weave on a 4 shaft I have to lift 1&3 then 2&4 (if I did it on 8 I would need 1&3&5&7 for one shot and then 2&4&6&8 - too easy confuse). I could do it on just 2 shafts but then I run into even more problems with not enough heddles. As I would be doing way more 4 shaft patterns it makes more sense to fill up the first 4 shafts. I was told this is a common problem, especially when stores set up the looms for people about where to distribute the heddles. I also got told I will never have enough heddles lol.

http://dustbunniesundermyloom.blogspot.com.au/2010/07/comedy-of-errors.html


So now my warp is wound Part 3 will be putting it on the loom without crying....Hopefully my auto ered denter will be in by that time to make this easier :)

Wednesday, August 3, 2016

Learning to Weave - Part 1 - Planning the Project

Ok, maybe not so much teaching you how to weave but watching me learn to weave. So I apologise for inaccuracies I will do my best Following my  mistakes and triumphs. I have the dream loom so what now?! There are guild classes but they are too expensive for me right now. My spinning place does them, but when I am supposed to be at uni. So I am doing a bit of self-directed learning with the ability to ask my spinning/weaving people each weekend.

So I set myself the task of following the NSW Handweavers and Spinners Guild Certificate in Handweaving (CHW) guidelines. They have several levels running for Basic to Master and have the first two levels requirements available on their site. The hope is that after I get through it all I will have something good enough to submit to get my first certificate.

So the first weave is a colour gamp......
GAMP....
GaMp?

When in doubt google, except for medical conditions.
After searching I discovered Gamps in weaving were
"a woven piece of fabric that illustrates what happens when different weave structures, yarns/fibers, colour etc,., intersect."
Thank you Knit Flix
www.weavingtoday.com
A colour gamp looks at the interaction of colour. These can be down in many weave patterns, but thankfully the CHW is just looking for a simple Tabby (meow) plain weave. Also, they have limited the colours to Red, Orange, Green, Blue, Violet, and Yellow each measuring 6.5cm on the reed.

So I picked up these colours from Petlins in a 22/2 Cottolin....
More weird words and numbers.
Cottolin was easy it is a mix of 60% cotton and 40% linen. I picked this over the 100% cotton as there was more variety in colour at the time.
22/2 - this is where it got confusing. This number reflects yarn sizes and involved maths....

The second or lowest number (as sometimes it is written 2/22) reflects the number of plies.
Ok easy.
The other number is the yards in a pound are equal to 11 hanks of 840 yards....
Not so easy...
What I got is bigger numbers tend to = thinner yarns. As cotton has a different weight to linen etc a 22/2 cottolin is not the same size as a 22/2 cotton. In fact, an 8/2 cotton seems to be the equivalent size.

I gave that up after highschool
So now I know the size of my yarn I need to figure out what the sett will be.....

Set point match?

A sett/set is the number of ends per inch (EPI). This is important and to figure this out you also need to know what the desired fabric you want to make is. The higher the sett for you yarn the stiffer, but the lower may make a very open loose weave that looks bad.

This is where I got caught out the most. There is no standard  to work from. After much searching the sett for a 22/2 cottolin ranged from 16 EPI-30EPI. That is a lot of difference. After much researching and talking to more talented people I decided that for a balanced weave I would need a 20EPI.

Inches...but I work in CM I need 6.5CM! So after playing with conversion I am settling for 52 ends per colour to get my 6.5cm. Inches didn't perfectly balance into my cm so I added a couple of extra ends.

I also had the choice between my 12dpi (dents per inch) or 8dpi reed. SO I have picked the 12 and will have to sley. Is I couldn't simply put one yarn through each dent I had to figure out a substitution through this lovely chart.

So I to get the required epi of 20 I would need to sley my 12dpi reed following this pattern: 1-2-2 (repeat till insane). Simple as mud right!

So hopefully the hard part is over now and I just have to warp, weave and finish.....
How I feel!


 Now onto making my warp!
moments later he left teeth marks on it

*I have tried to translate the weaving language, but if something didn't make sense go to this lovely set of weaving terms. I will start up my own page of terms as I learn them too!


Monday, August 1, 2016

Will it Blend?

Unlike the famous YouTube Channel this blending is much less dangerous to one's health. Our group has been doing a bit of a project. From Ashford's The Wheel magazine  (issue 26, 2015) Raeleen's Wrap.

This project requires the blending of many Ashford slivers. Spun as singles and then felted. Other members have been experimenting with different colours, thickness, and needle size resulting in some beautiful results and also learning techniques in blending for the desired look. So this was my time.

Apparently, my throw everything on the board approach doesn't work
Mixture of the following Ashford Slivers
- Amethyst
- Aubergine
- Raspberry
- Chocolate
- Olive
- Butterscotch
- Green Tea
- Toffee
- Cherry Red
- Fern Green
- Cheesecake

So I separated the silvers into equal piles and went to work. As I wanted to avoid getting muddy colours I worked with long lengths of colours. So here are the lovely results.


Pretty Punis!

It felt lovely painting the fleece and getting such immediate pretty results.
I got to play with the tutors blending board, while I have my own it is quite old and needs to remain on the table and held down with a heavy clamp. The Ashford Blending board is a lot nicer and can be  placed in the lap.


My board carder, functional but UGLY

I'm slowly getting better at the skill. Ashford does a lovely video about how to blend. Much. Better than anything I could write here so I will link to them for a lovely visual (and colourful) lesson in blending.


Now to make sure I keep up with my colour theory!

Saturday, July 30, 2016

Saying Goodbye to a Wheel

Rustic approach
One thing I know about myself is when I start something I tend to go into it the whole hog. Hence why I have so many wheels and equipment etc. Now I have had a year of spinning (August is my Anniversary) I have refined my tastes a little. So some items are being sold or either upgraded.

One thing I have been finding compared to all the pieces of equipment that pass through my hands is it can be hard to say goodbye to a wheel. I am having to counter attachment to an object. This Peggy was made the same year I was born and came from a lovely lady with a story that touched a lot on why I was doing my PhD project.

So with a sad note, I decided that my poor Wee Peggy deserved better than standing in the corner looking pretty and needed an ower. So today my Peggy is heading home to its new owner in another state. So before she left I decided to do so glamour shots! (Probably should have done that to help sell). I have no more Peggy's now.


Freshly waxed and ready to go

Other items that have gone recently include:
Original Ashford 4 Shaft Loom
Hopefully my 80cm Rigid Heddle is being picked up tomorrow
Still for sale is my Wooden 4 shaft loom
Large Inkle Loom
I still don't know whether I will sell my 8 shaft Kirsten loom or not. 

I have been destashing bags of fleece as well with my sales so getting lots more room as I go. 

Friday, July 22, 2016

Oh, What a Tangled Web We Weave When We First Practice.

Things have taken a turn to the weaving. My weaving stockpile has been evolving. What once started as a rigid heddle from Ashford, 8 shaft Kirsten loom and two old 4shaft looms. I now have swapped out my Ashford rigid heddle from a Kromski Harp Rigid Heddle of the same size (80cm), a 30cm Ashford Knitters Loom and my new pride and joy an Ashford 8 shaft loom (60cm). So right now I have 6 looms (one got sold already). So my Ashford Rigid heddle, 4 shaft and 8shaft Kirsten are all getting themselves put on eBay and awaiting new homes.
Curious Kitty wondering what new product is this mum?...

I'll do a review on the rigid heddles now I have had a chance to try three and also explain why I would still want a Majacraft Dynamic Heddle. I will also show my new baby in another post. However this time, I thought instead of equipment I would actually show the damn things being used!

So my Ashford Knitters Loom came with a double heddle block and extra heddles. So what does an inexperienced person who has only done two plain weave scarves do? Set up and work a double heddle and learn two new weaving skills!
A trial of patience!

On Ashford's site they have a pattern for a shuttle holder. So I'm still weaving it but wanted to share my progress.

The camera hides the flaws!


So many sheds!
This pattern not only required two heddle, but also two pickup sticks inserted behind the heddle to create two more sheds.
Brooks Bouquet being the fancy part!
This holder not only uses plain weave, but also two-layered weaving and Brooks Bouquet.

Hard to capture the bottom black layer being separated out


When it gets completed it will hopefully look similar to this ----------->
I am not doing the repeats of Brooks Bouquet, with just one between each section.


The pattern is fairly good, but I have found missing information about the desired length of the entire project or the length of each section. So I am just eyeballing it. I am making each holder the height of two shuttles and hoping for the best.

I am also working very very very! hard on my edges. As I am trying different techniques it is not 100% consistent though I am seeing progress. It is hard when weaving the bottom layer as not only is it slightly hidden by the top, but I used the suggested black which is almost impossible to see to check my edges. If I were doing another I would put the lighter colour at the bottom as the pattern is reversible so it doesn't matter.

Wednesday, July 6, 2016

Majacraft High-Speed Head

For my Birthday awhile back I decided to get something bigger for my wheel. I frequently spin quite thin so I have been looking at the high speed head. I do have a high speed whorl which I like. The whorl is kinda considered the replacements for the head, but there are benefits for having and using both. None of the Aussie suppliers had this advertised so I tried a NZ distributor Alpaca Box. One thing I noticed about Majacraft in general while looking for distributors is their site lists many, but few have much if anything listed on their site or no longer exist. The lovely owner emailed me quickly and on finding out the delay in making a new one offered me the demo one she had just taken out of the packet. So instead of waiting 4-6 weeks I said yes and got it in a week. 


The wood is just beautiful and it makes the rest of my very old Suzy very tarnished by comparison! All I had to do to change the head over was undo the large screw the top, removed and the entire head head pulls up or pushes in. Put screw back in and tighten and done. 1 minute change!

Too much fleece behind the wheel

I put my flyer on the right hand side (previously left) as it felt better and sat better, but either side is feasible. As you can see there are extra components. the whorl comes with it and gives me an extra whorl in general to play with. While the usual drive band to whorl configuration still exists they kinda borrow from the Aura with a second rubber band that drive the flyer on the other side

Lovely wood grain there

The front view (or spinners view) the tensioning system comes with a smaller, lighter spring. Thankfully they also gave lots of tension band as I have broke it once during a spinning marathon. Thankfully only a few cm's from the end so was a very easy fix. 

So was it worth it. So far I am still breaking it in. I defiantly is faster and even without the smaller whorl it changes the Suzy range of speeds from 4.2-14.5 to 11.4-27.
It would be ver interesting to try all the different whorls to see what ranges I can get. Even the fast speed whorl by itself only goes from 9.5-18.8 so this defiantly gives a boost. I think I will really appreciate it when I get to cotton spinning! As I have my Aura and love it I am changing this Suzie up to a specialised high-speed spinning wheel. I am glad I got it, would I recommend it - maybe. Only if you need/want extreme high speeds, but I would try the whorl first and see if that works as it is much cheaper.

I will give an update later after I have used it for a few more spinning adventures. 

Monday, July 4, 2016

Regrets and Success

I got this lovely skein of 100% cashmere from the Hawkesbury Show a few months back. I finally pulled it out to get it started and stupidly decided I didn't need t use my umbrella swift to get it would up. 

This resulted in the below ungodly mess!

Cries loudly

Two evenings later I finally got it into a centre pull ball and started making the scarf pattern that came with it. 


Note to self - always use your swift as you always make a mess when you try and take the "quick" route. Thankfully I didn't break it or leave any knots. Worst case scenario Ravelry has a group dedicated to people who enjoy undoing yarn messes called Knot a Problem. There is even a thread about the worst mess every successfully fixed.

Twitter Delicious Facebook Digg Stumbleupon Favorites More